Claude Code Cloud Setup Guide (Vertex AI & Bedrock)
This guide walks UW-Madison researchers and staff through setting up Claude Code with a cloud provider — either Google Vertex AI or Amazon Bedrock. It covers Windows and macOS, with provider-specific steps in tabs so you can follow whichever path matches your institutional account.
AI tools, pricing, features, and contractual terms change frequently. This guide is community guidance, not official UW-Madison policy. For the latest institutional policies, data-use agreements, or questions about what data types are permitted with specific tools, consult UW-Madison Research Cyberinfrastructure or your department’s IT office.
See our companion guide, Claude Code Best Practices, for a broader introduction to agentic coding tools and how to use them effectively.
Vertex AI and Bedrock routing is only supported in the Claude Code CLI (terminal) and IDE extensions (VS Code, JetBrains). The Claude Desktop app (Code tab) and Web IDE require a direct Anthropic login (Max plan or API credits) — they cannot be configured to route through a cloud provider at this time. If you need the desktop GUI or web experience, you’ll need a separate Claude Max subscription. This guide covers the CLI path.
UW-Madison does not currently have a direct data-use or privacy agreement with Anthropic. While UW has agreements with cloud providers (Google, AWS, Microsoft) for their respective services, those agreements do not extend to Anthropic’s data handling — your prompts still reach Anthropic’s infrastructure for inference regardless of which cloud provider routes the request.
What this means in practice:
- Do not use Claude Code with restricted data (HIPAA/PHI, FERPA, CUI, export-controlled, or data under a DUA that prohibits third-party processing) until a formal UW-Anthropic agreement is in place.
- Avoid running Claude Code on machines where restricted data is stored. Even with sandboxing enabled, Claude can still read files outside your project directory — sandboxing only restricts writes. Anything Claude reads can be sent to Anthropic’s servers as part of a prompt. If you must run Claude Code on a machine with sensitive files, configure deny rules to block read access to sensitive paths (see Section 7) — but note that
Readdeny rules are best-effort and can be bypassed by allowed Bash commands likecat. The safest approach is to keep restricted data off machines where Claude Code runs. - Always enable sandboxing (Section 8) — it prevents unintended writes outside your project and adds network isolation. These are valuable protections even though read access isn’t fully restricted.
- The web version offers the strongest isolation — each task runs in a fresh, ephemeral VM that can only access your cloned GitHub repo. It cannot reach your local filesystem, SSH keys, or other local resources, and storage is wiped when the task completes. This eliminates the local file-read risk entirely. However, the web version requires a paid Anthropic subscription (Pro $20/month through Max $200/month), which currently must be paid out of pocket — UW does not yet have institutional Anthropic billing in place.
- For general/non-sensitive research code, cloud-routed Claude Code is fine to use today — your code is not used for model training under commercial terms, and telemetry is disabled by default for third-party providers.
UW-Madison is actively exploring institutional Anthropic licenses, credits, and data agreements to make this easier. We’ll update this guide as the situation evolves.
Why use a cloud provider instead of a direct subscription?
You can use Claude Code with a personal Claude Max subscription ($100–$200/month, unlimited usage) — no cloud setup required. So why go through the extra complexity of routing through a cloud provider?
What cloud providers give you:
- Institutional billing and cost tracking — charges go to your UW-Madison cloud project, not your personal credit card. This matters for grant-funded research, shared lab budgets, and institutional procurement. UW-Madison has negotiated cloud discounts with both GCP and AWS, including reduced overhead on grants (26% vs 55.5% F&A) and NIH STRIDES pricing.
- Enterprise security controls — both GCP and AWS let you manage IAM permissions, control network traffic, and audit API usage within your cloud project. Note that these controls govern access to your cloud resources — they do not change how Anthropic handles your data once it reaches their infrastructure.
What cloud providers do NOT change:
- Your prompts still reach Anthropic’s infrastructure. Neither Vertex AI nor Bedrock runs the model inside your cloud project — your provider routes requests to Anthropic’s serving infrastructure. This means your data is processed by Anthropic regardless of which cloud provider you use.
- UW’s cloud agreements don’t cover Anthropic’s data handling. UW-Madison has agreements with Google, AWS, and Microsoft for their respective services, but those agreements do not extend to Anthropic. There is no UW-Anthropic data-use agreement in place yet, so routing through a cloud provider does not give your data the same protections it would have for a native cloud service. See the warning above for practical guidance.
- Data storage location is not controlled by your deployment choice. Anthropic stores data in the US, with processing distributed across multiple regions for reliability. If you need geographic control over where inference runs, that’s a separate data residency feature, not a cloud provider feature.
- Training exclusion still applies. Under Anthropic’s commercial terms (including both Vertex AI and Bedrock), your prompts and outputs are not used for model training. This is a positive, but it is distinct from having a comprehensive data-use agreement. See Data Usage & Privacy for full details on retention, telemetry, and opt-outs.
Bottom line: If you just want to try Claude Code personally, a Claude Max subscription is simpler and often cheaper for heavy individual use. Cloud providers make sense when you need institutional billing or enterprise security controls. However, neither approach currently provides UW-sanctioned data protections for restricted or sensitive data — UW is actively working toward an institutional Anthropic agreement. For now, avoid running Claude Code on machines that contain restricted data, since even sandboxing doesn’t prevent reads — and always enable sandboxing to at least restrict writes and network access. UW-Madison provisions both GCP and AWS accounts for research groups — running Claude Code through either provider is just one of many uses.
Already set up? Returning User Quick-Start
If you’ve already completed the full setup and just need to start a new session:
# If your credentials have expired (you'll get auth errors):
gcloud auth application-default login

# Navigate to your project and launch
cd ~/projects/my-project   # macOS / Linux / WSL2 (recommended for Windows)
# cd C:\Users\you\projects\my-project   # Windows PowerShell (no sandbox support)
claude
# If your credentials have expired (you'll get auth errors):
aws sso login --profile your-profile
# Or re-export your AWS_ACCESS_KEY_ID and AWS_SECRET_ACCESS_KEY
# Navigate to your project and launch
cd ~/projects/my-project # macOS / Linux / WSL2 (recommended for Windows)
# cd C:\Users\you\projects\my-project # Windows PowerShell (no sandbox support)
claudeWindows users: For the best experience — including OS-level sandboxing — run Claude Code from WSL2 instead of PowerShell. Native Windows does not support sandboxing. If you haven’t set up WSL2 yet, see Section 8 — Sandboxing (Windows/WSL2) for a full walkthrough.
Once inside Claude Code:
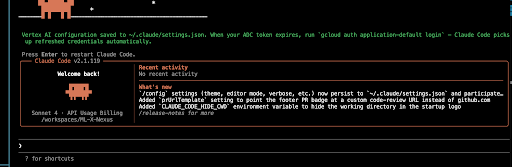
/status       # Confirm your cloud provider is active and project/region are correct
/sandbox      # Enable sandboxing if not already persistent in settings
/cost # Check token usage at any time during your sessionVertex AI: If you get 401/403 errors, re-run gcloud auth application-default login. If you get 404 “model not found” errors, check your region settings in ~/.claude/settings.json (see Section 5). If you get 429 “resource exhausted” errors, you need a quota increase (see Troubleshooting).
Bedrock: If you get AccessDeniedException, check your IAM permissions and ensure model access is enabled. If you get ValidationException: Model not found, verify your AWS_REGION and model IDs. If credentials expired, re-run aws sso login or refresh your access keys.
1. Prerequisites
Both platforms:
- Internet connection
- A UW-Madison GCP project with billing enabled (e.g.,
doit-gcp-PROJECT-ID)
- A UW-Madison AWS account with billing enabled
- Windows 10 (build 1809+) or Windows 11
- PowerShell (use this — not Git Bash, not CMD)
- macOS 13.0 (Ventura) or later
- Terminal (built-in) or any terminal emulator (iTerm2, Warp, etc.)
See the official Claude Code system requirements for the full list (OS versions, RAM, shell, etc.).
2. Install Claude Code
Official install docs: code.claude.com/docs/en/setup
Open PowerShell and run:
irm https://claude.ai/install.ps1 | iexDo NOT use Git Bash (MINGW64) — the installer does not support it. Use PowerShell only.
After installation, you’ll likely see a message that C:\Users\<you>\.local\bin is not in your PATH. Fix this:
- Press Win + R, type
sysdm.cpl, press Enter. - Go to Advanced tab → Environment Variables.
- Under User variables, select
Path→ click Edit. - Click New and add:
C:\Users\<your-username>\.local\bin - Click OK on all dialogs.
- Close and reopen PowerShell.
Verify:
claude --versionOpen Terminal and run:
curl -fsSL https://claude.ai/install.sh | bashAlternatively, if you use Homebrew:
brew install --cask claude-codeAfter installation, restart your terminal (or run source ~/.zshrc), then verify:
claude --versionThe native installer places the binary at
~/.claude/bin/claudeor~/.local/bin/claudeand updates your shell profile automatically. Ifclaudeisn’t found, ensure one of these paths is in your$PATH.
A VS Code devcontainer gives you a reproducible, isolated environment for using Claude Code with Vertex AI or Bedrock — useful if you want the cloud CLIs and Claude CLI pre-installed without touching your host system, or if you’re collaborating with others on a shared setup.
Prerequisites:
- VS Code
- Docker Desktop
- Dev Containers extension for VS Code
Set up a devcontainer in your project:
Open your project folder in VS Code. Either
cdinto the folder in your terminal and runcode .(the.means “this folder”), or launch VS Code and go to File → Open Folder… (orCtrl+K Ctrl+O) and pick the folder. You’ll know it worked when the file tree in the left sidebar shows your project’s files.Make sure Docker Desktop is running before the next step. Launch it from the Start menu / Applications and wait for the whale icon in the system tray to stop animating (~30–60 seconds). If you skip this you’ll get a “Docker daemon is not running” error.
Open the command palette (Cmd/Ctrl + Shift + P) and run Dev Containers: Add Dev Container Configuration Files…. Choose Ubuntu → noble (the current LTS —
latestandnoblepoint to the same image). When prompted to select additional features, you can skip that screen — we’ll set them explicitly in a moment. VS Code creates.devcontainer/devcontainer.json:{ "name": "claude-code", "image": "mcr.microsoft.com/devcontainers/base:ubuntu", "features": { "ghcr.io/devcontainers/features/node:1": { "version": "latest" } } }Run Dev Containers: Reopen in Container to build and launch. First build takes 3–5 minutes — Docker is downloading the base image and installing features. VS Code will reload into the container automatically when it’s done. You’ll know you’re inside the container because:
- The bottom-left status bar shows a green badge: “Dev Container: claude-code”
- New terminals (Ctrl +
</kbd>) open asbashshells with a prompt likevscode ➜ /workspaces/my-project $`, not PowerShell.
You’ll see a “Command failed” dialog with an exit code but no detail. The real error is upstream:
- Click Show Log on the dialog, or run
Ctrl+Shift+P→ Dev Containers: Show Container Log. - Scroll up from the bottom to find the first line containing
ERRORorfailed to. That’s the actual cause. - Common culprits: Docker Desktop not fully started, an unmaintained third-party feature failing on a newer Ubuntu base (see Section 3), or a corporate VPN blocking image pulls from
ghcr.io/mcr.microsoft.com.
See Section 3 for a fuller devcontainer.json that also installs gcloud, Python, Claude Code, R, and Quarto.
/sandbox — the container is your sandbox
Don’t try to run Claude Code’s /sandbox (bubblewrap) inside a devcontainer. It won’t work out of the box on the standard Ubuntu image — Docker’s default seccomp/AppArmor profile strips the user-namespace capabilities bubblewrap needs, and Ubuntu 24.04+ adds a further kernel.apparmor_restrict_unprivileged_userns block. Making it work requires loosening container security (--security-opt apparmor=unconfined, setuid bwrap) and enabling Anthropic’s enableWeakerNestedSandbox flag, which the official docs warn “considerably weakens security.”
Instead, treat the container itself as the isolation boundary — this is the model Anthropic’s own reference devcontainer uses (Docker isolation plus a firewall init script for restricted egress). One practical upside: because the container is the boundary, running Claude Code with --dangerously-skip-permissions (“YOLO mode”) inside is much more defensible than on your host machine.
If you want OS-level sandboxing, run Claude Code natively (macOS or WSL2) and follow Section 8. If you want container isolation, use the devcontainer and skip /sandbox.
3. Install & Configure Your Cloud CLI
Official gcloud install docs: cloud.google.com/sdk/docs/install
Download and install the Google Cloud CLI for Windows. The installer adds gcloud to your PATH automatically.
Fix PowerShell Execution Policy (if needed):
If gcloud gives you a “running scripts is disabled” error:
Set-ExecutionPolicy RemoteSigned -Scope CurrentUserType Y to confirm.
If you’re running Claude Code from WSL2, you need gcloud installed inside your WSL2 environment (the Windows installation is not accessible from WSL2):
sudo apt-get install apt-transport-https ca-certificates gnupg curl
curl https://packages.cloud.google.com/apt/doc/apt-key.gpg | sudo gpg --dearmor -o /usr/share/keyrings/cloud.google.gpg
echo "deb [signed-by=/usr/share/keyrings/cloud.google.gpg] https://packages.cloud.google.com/apt cloud-sdk main" | sudo tee /etc/apt/sources.list.d/google-cloud-sdk.list
sudo apt-get update && sudo apt-get install google-cloud-cli
Option A — Homebrew (easiest):
brew install --cask google-cloud-sdkOption B — Official installer:
curl https://sdk.cloud.google.com | bashThen restart your terminal or run:
source ~/.zshrc # or source ~/.bashrcIf you set up the devcontainer in Section 2, use this devcontainer.json to get Python, Node, Claude Code, R, Quarto, and gcloud pre-installed:
{
    "name": "claude-code",
    "image": "mcr.microsoft.com/devcontainers/base:ubuntu",
    "features": {
        "ghcr.io/devcontainers/features/node:1": {},
        "ghcr.io/devcontainers/features/python:1": {},
        "ghcr.io/anthropics/devcontainer-features/claude-code:1.0": {},
        "ghcr.io/rocker-org/devcontainer-features/r-rig:1": {
            "version": "release"
        },
        "ghcr.io/rocker-org/devcontainer-features/quarto-cli:1": {}
    },
    "postCreateCommand": "sudo apt-get update && sudo apt-get install -y apt-transport-https ca-certificates gnupg curl && curl https://packages.cloud.google.com/apt/doc/apt-key.gpg | sudo gpg --dearmor -o /usr/share/keyrings/cloud.google.gpg && echo 'deb [signed-by=/usr/share/keyrings/cloud.google.gpg] https://packages.cloud.google.com/apt cloud-sdk main' | sudo tee /etc/apt/sources.list.d/google-cloud-sdk.list && sudo apt-get update && sudo apt-get install -y google-cloud-cli"
}postCreateCommand for gcloud instead of a devcontainer feature?
The popular community feature ghcr.io/dhoeric/features/google-cloud-cli is unmaintained and fails to install on Ubuntu 24.04 (Noble) — the current default base image — because its install script relies on apt-key, which Debian/Ubuntu removed in favor of the keyring directory approach. If you use it, the container build errors out with ./install.sh: line 72: apt-key: command not found.
postCreateCommand is a generic escape hatch built into the devcontainer spec: it runs once, automatically, the first time a container is created from this config. We use it to run the modern (keyring-based) install commands directly, which is exactly what you’d run by hand on WSL2. This pattern works for any tool that doesn’t have a working, maintained devcontainer feature — just write the install commands you’d normally run, joined with &&.
What persists across sessions: stopping/restarting the container (closing and reopening VS Code) keeps everything intact, including gcloud and your gcloud auth credentials. Rebuilding the container (e.g., when you change devcontainer.json) wipes state and re-runs postCreateCommand — which is the whole point: anyone who clones this repo gets the same environment automatically.
Once the container is running, open a VS Code terminal (Ctrl + `) and authenticate with GCP:
Log in with your UW-Madison Google account:
gcloud auth login --no-launch-browserSet application default credentials (this is what Claude Code actually uses):
gcloud auth application-default login --no-launch-browserSet your project:
gcloud config set project YOUR-PROJECT-IDExport the credentials path:
export GOOGLE_APPLICATION_CREDENTIALS=~/.config/gcloud/application_default_credentials.jsonVerify everything is working:
gcloud auth list
gcloud auth print-access-token | head -c 20
echo $GOOGLE_APPLICATION_CREDENTIALS
Enable the Vertex AI platform:
gcloud services enable aiplatform.googleapis.com
Start Claude Code in VS Code:
- In the terminal, run
claudeto launch the Claude Code CLI. - When prompted, select option 3 (3rd party platform) → Google Vertex AI.
- Choose a model (e.g.,
claude-opus) and save the configuration. - Select I trust this folder. You’re set!
When you’re done, disable the AI platform to avoid unintended costs:
Quit the Claude Code CLI, then run:
gcloud services disable aiplatform.googleapis.comAuthenticate (both platforms):
These commands are identical on both Windows and macOS:
# Log in with your UW-Madison Google account
gcloud auth login

# Set your GCP project
gcloud config set project YOUR-PROJECT-ID

# CRITICAL — this is what Claude Code actually uses to authenticate
gcloud auth application-default login
Both login commands open a browser window. Sign in with your UW-Madison email and grant the requested permissions.
Verify everything is configured correctly:
gcloud config listYou should see your UW-Madison email under [core] account and your project ID under [core] project.
Official AWS CLI install docs: docs.aws.amazon.com/cli/latest/userguide/getting-started-install.html
Download and run the AWS CLI MSI installer for Windows. The installer adds aws to your PATH automatically.
Verify:
aws --versionOption A — Homebrew (easiest):
brew install awscliOption B — Official installer:
curl "https://awscli.amazonaws.com/AWSCLIV2.pkg" -o "AWSCLIV2.pkg"
sudo installer -pkg AWSCLIV2.pkg -target /
Verify:
aws --versionAuthenticate (both platforms):
Claude Code uses the standard AWS credential chain. Choose one of these methods:
Option A — AWS SSO (recommended for UW-Madison):
# Configure your SSO profile (one-time setup)
aws configure sso
# Follow the prompts: SSO start URL, region, account, role

# Log in (do this whenever credentials expire)
aws sso login --profile your-profile-name
Option B — IAM access keys:
aws configure
# Enter your AWS Access Key ID, Secret Access Key, and region
Option C — Environment variables:
export AWS_ACCESS_KEY_ID="your-access-key"
export AWS_SECRET_ACCESS_KEY="your-secret-key"
export AWS_REGION="us-east-1"If your institution uses AWS SSO or federated identity, Option A is the most secure — no long-lived credentials on disk. Ask your UW-Madison AWS administrator which method your account uses.
4. Enable API Access & Request Models
Official Vertex AI setup: code.claude.com/docs/en/google-vertex-ai
Google’s Claude on Vertex docs: cloud.google.com/vertex-ai/generative-ai/docs/partner-models/claude
Enable the API:
gcloud services enable aiplatform.googleapis.com --project=YOUR-PROJECT-IDRequest access to Claude models:
- Go to the Vertex AI Model Garden in the GCP Console.
- Search for the Claude model you want (e.g., Claude Sonnet 4).
- Click the model card and complete the access request form.
- Approval may take minutes to a couple of days.
Verify IAM permissions:
Your GCP account needs the roles/aiplatform.user role (Vertex IAM docs), which includes:
aiplatform.endpoints.predict(model invocation)aiplatform.endpoints.computeTokens(token counting)
If you don’t have this, ask your UW-Madison GCP administrator to grant it.
Official Bedrock setup: code.claude.com/docs/en/amazon-bedrock
AWS Bedrock model access docs: docs.aws.amazon.com/bedrock/latest/userguide/model-access.html
Enable model access:
- Open the Amazon Bedrock console and select your region (e.g., us-east-1).
- Go to Model catalog in the left sidebar.
- Find the Claude model you want (e.g., Claude Sonnet 4.6) and click Request model access.
- AWS will ask for a brief use-case description. A one-sentence explanation is sufficient. For most Claude models, approval is automatic and takes less than a minute.
The first time you request access to Anthropic models on a new AWS account, you’ll need to complete a First Time Use (FTU) form with use-case details. This is a one-time per-account requirement.
Verify IAM permissions:
Your AWS identity needs permissions to invoke Bedrock models. At minimum, create (or ask your admin to attach) an IAM policy with:
{
  "Version": "2012-10-17",
  "Statement": [
    {
      "Effect": "Allow",
      "Action": [
        "bedrock:InvokeModel",
        "bedrock:InvokeModelWithResponseStream",
        "bedrock:ListInferenceProfiles",
        "bedrock:ListFoundationModels"
      ],
      "Resource": "*"
    }
  ]
}
If your account uses AWS Marketplace for model access, you may also need aws-marketplace:Subscribe and aws-marketplace:ViewSubscriptions permissions.
5. Configure Claude Code
Edit (or create) your settings file at ~/.claude/settings.json.
| Platform | Full path |
|---|---|
| Windows (PowerShell) | C:\Users\<your-username>\.claude\settings.json |
| Windows (WSL2) | /home/<your-username>/.claude/settings.json |
| macOS | /Users/<your-username>/.claude/settings.json |
WSL2 has its own home directory. If you set up Claude Code in both Windows PowerShell and WSL2, you need settings.json in both locations — they are completely separate filesystems. The Windows file at C:\Users\you\.claude\settings.json is not visible to WSL2. Similarly, gcloud must be installed and authenticated separately inside WSL2 (see Section 3).
{
  "model": "claude-sonnet-4-6",
  "autoUpdatesChannel": "latest",
  "env": {
    "CLAUDE_CODE_USE_VERTEX": "1",
    "CLOUD_ML_REGION": "global",
    "ANTHROPIC_VERTEX_PROJECT_ID": "YOUR-PROJECT-ID"
  },
  "sandbox": {
    "enabled": true
  }
}
Replace YOUR-PROJECT-ID with your actual GCP project ID (e.g., doit-rci-sandbox-gcp-baa4).
Region notes:
globalis typically the cheapest and is a good default.- Not all models are available on the global endpoint. If you get 404 “model not found” errors, add region overrides for specific models by adding more entries to the
envblock:
"VERTEX_REGION_CLAUDE_3_5_HAIKU": "us-east5",
"VERTEX_REGION_CLAUDE_4_0_SONNET": "us-east5"
{
"model": "claude-sonnet-4-6",
"autoUpdatesChannel": "latest",
"env": {
"CLAUDE_CODE_USE_BEDROCK": "1",
"AWS_REGION": "us-east-1",
"AWS_PROFILE": "your-profile-name"
},
"sandbox": {
"enabled": true
}
}Replace your-profile-name with your AWS CLI profile name (from aws configure sso or aws configure). If you’re using environment variables for credentials instead of a profile, omit AWS_PROFILE and set AWS_ACCESS_KEY_ID and AWS_SECRET_ACCESS_KEY in the env block.
Region notes:
us-east-1has the broadest model availability and is a good default.- Not all models are available in all regions. Check the Bedrock model support by region page if you get “model not found” errors.
Model pinning (recommended):
Bedrock model aliases can change when new versions are released. To avoid surprises, pin specific model versions in your env block:
"ANTHROPIC_DEFAULT_SONNET_MODEL": "claude-sonnet-4-6",
"ANTHROPIC_DEFAULT_OPUS_MODEL": "claude-opus-4-6",
"ANTHROPIC_DEFAULT_HAIKU_MODEL": "claude-haiku-4-5-20251001"Do not include // comments in settings.json. The examples elsewhere in this guide use jsonc syntax for readability, but settings.json is parsed as plain JSON, which does not support comments. If you copy-paste a block with comments, Claude Code will report “Invalid or malformed JSON” in claude doctor.
The model field sets your default model — claude-sonnet-4-6 is a good balance of cost and capability. Change it to claude-opus-4-6 if you need maximum reasoning power (at higher cost).
The sandbox config above enables OS-level isolation that restricts Claude’s bash commands to your project directory. It works out of the box on macOS (uses Apple’s Seatbelt). On Linux/WSL2, you must first install bubblewrap and socat — see Section 8 for step-by-step instructions including how to verify you’re on WSL2 (WSL1 is not supported). Native Windows (PowerShell) does not yet support sandboxing — the setting will be ignored, so leave it in place for when support arrives. See Section 8 for full configuration details.
6. Verify the Setup
Run these in your terminal (PowerShell on Windows, Terminal on macOS):
claude --version
claude doctor
Then launch Claude Code from a project directory:
cd C:\Users\you\projects\my-project
claude
cd ~/projects/my-project
claudeOn first launch, Claude Code will present a login method selection screen. Since you’re using a 3rd-party cloud provider, select option 3 (“3rd-party platform”) and then choose your provider (e.g., Vertex AI) when prompted. Claude Code will detect your cloud credentials automatically — no API key is needed.
Once inside Claude Code, run /status to confirm your provider is active:
API provider: Google Vertex AI
GCP project: your-project-id
Default region: global
API provider: Amazon Bedrock
AWS region: us-east-1When using either cloud provider, the /login and /logout commands are disabled — authentication is handled entirely through your cloud CLI credentials (gcloud or aws).
7. Filesystem Safety & Permissions
Official permissions docs: code.claude.com/docs/en/permissions
Sandboxing docs: code.claude.com/docs/en/sandboxing
Understand the risk before you start
This is the single most important thing to understand before using it.
When you launch Claude Code from the CLI, it has access to your current working directory — but it is not strictly confined to it. Without sandboxing enabled, Claude can read, modify, create, or delete files anywhere your user account has access, including parent directories, your home folder, and system files. Independent testing has confirmed that without sandboxing, Claude can create files in parent directories above the working directory without any special prompt.
This means a poorly worded prompt, an agentic loop, or a prompt injection attack embedded in a file Claude reads could cause changes in places you didn’t intend.
Practical recommendations:
- Avoid running Claude Code on machines where restricted or sensitive data is stored. Sandboxing restricts writes but not reads — Claude can still read files anywhere on the machine and send their contents to Anthropic’s servers as part of a prompt. UW does not yet have a data-use agreement with Anthropic (see warning above), so even cloud-routed usage sends your prompts to Anthropic’s infrastructure.
- Keep passwords and API keys out of local storage entirely. Permission settings are only an extra layer and can be finicky — don’t count on them to protect a plaintext secret sitting on disk. Store secrets in 1Password and inject them at runtime instead (see the 1Password section below).
- If you must run on a machine with sensitive files, add deny rules (see below) to block read access to sensitive paths. But note that
Readdeny rules are best-effort — allowed Bash commands likecatcan still read denied files. Denying bothReadand the relevantBashpatterns together provides stronger protection (see this security deep-dive for details). - Test only within isolated Git repositories, with no sensitive data present in the local repo.
- Always enable sandboxing (Section 8) — it restricts writes to your project directory and adds network isolation at the OS level. It’s available on macOS (built-in) and Linux/WSL2 (requires
bubblewrap). Native Windows does not yet support it.
Always launch from your project directory
cd C:\Users\you\projects\my-project
claude
cd ~/projects/my-project
claudeClaude Code defaults to operating in the directory where it’s launched. Starting from C:\ or / or your home directory gives it an unnecessarily broad scope.
Use Git as your safety net
Always work inside a Git repository. This is your most important protection:
- You can instantly see what changed with
git diff. - You can revert any unwanted changes with
git checkout .orgit stash. - Claude Code itself is Git-aware and will generally respect repository boundaries.
Before starting a Claude Code session, make sure your working tree is clean (commit or stash pending changes). That way, anything Claude does can be cleanly reviewed or rolled back.
Use the default permission mode
Out of the box, Claude Code asks for your approval before running most commands. Do not change this unless you understand the implications. Specifically:
- Do NOT use
--dangerously-skip-permissionsunless you’re in an isolated container/VM. This flag bypasses all safety checks. - Do NOT set the mode to
bypassPermissionsin settings.
Understand how permissions actually work
In the default mode, Claude Code already asks for your approval before running most commands that modify your system (file writes, bash commands, network requests, etc.). Read-only operations like viewing files generally run without prompting.
You can customize this behavior with three types of rules in settings.json:
deny— Hard block. Claude cannot use the tool, period. You won’t even be asked. Deny rules always win over allow rules.allow— Auto-approve. Claude can use the tool without asking you first. This is a convenience shortcut — it skips the approval prompt for things you trust.ask— Force a prompt, even if something else would auto-approve it.
You do NOT need to add allow rules for Claude Code to work. Without any custom rules, it will simply ask you to approve each action as it comes up. The default behavior is already safe — deny rules are the ones that add protection, while allow rules just reduce the number of prompts you see.
Add deny rules to protect sensitive areas
Add a permissions block to your ~/.claude/settings.json file (the same file you edited in Section 5). Think of deny rules as guardrails — they block Claude from accessing sensitive paths. Like any guardrail, they reduce risk rather than eliminate it (see the caveats at the end of this section), so pair them with the runtime secret injection covered next.
These examples block: SSH keys, .env files, cloud credentials (~/.config/gcloud/ and ~/.aws/), destructive commands (rm -rf), and network tools (curl, wget). Replace endemann with your actual username before pasting into settings.json.
settings.json is plain JSON — no comments allowed. The blocks below are ready to copy-paste. Do not add // comments or Claude Code will report “Invalid or malformed JSON” in claude doctor.
Home directory is /Users/endemann. Run whoami to check your username.
{
  "permissions": {
    "deny": [
      "Read(//Users/endemann/.ssh/**)",
      "Edit(//Users/endemann/.ssh/**)",
      "Read(//Users/endemann/.env)",
      "Edit(//Users/endemann/.env)",
      "Read(//Users/endemann/.config/gcloud/**)",
      "Edit(//Users/endemann/.config/gcloud/**)",
      "Read(//Users/endemann/.aws/**)",
      "Edit(//Users/endemann/.aws/**)",
      "Bash(rm -rf *)",
      "Bash(curl:*)",
      "Bash(wget:*)"
    ]
  }
}
Home directory is C:\Users\endemann. Run echo $env:USERNAME to check your username. Note: use forward slashes in permission rules, even on Windows.
{
  "permissions": {
    "deny": [
      "Read(//C:/Users/endemann/.ssh/**)",
      "Edit(//C:/Users/endemann/.ssh/**)",
      "Read(//C:/Users/endemann/.env)",
      "Edit(//C:/Users/endemann/.env)",
      "Read(//C:/Users/endemann/.config/gcloud/**)",
      "Edit(//C:/Users/endemann/.config/gcloud/**)",
      "Read(//C:/Users/endemann/.aws/**)",
      "Edit(//C:/Users/endemann/.aws/**)",
      "Bash(rm -rf *)",
      "Bash(curl:*)",
      "Bash(wget:*)"
    ]
  }
}
Home directory is /home/endemann. Run whoami to check your username.
{
  "permissions": {
    "deny": [
      "Read(//home/endemann/.ssh/**)",
      "Edit(//home/endemann/.ssh/**)",
      "Read(//home/endemann/.env)",
      "Edit(//home/endemann/.env)",
      "Read(//home/endemann/.config/gcloud/**)",
      "Edit(//home/endemann/.config/gcloud/**)",
      "Read(//home/endemann/.aws/**)",
      "Edit(//home/endemann/.aws/**)",
      "Bash(rm -rf *)",
      "Bash(curl:*)",
      "Bash(wget:*)"
    ]
  }
}The // prefix in permission rules means “absolute path from the filesystem root” — there is no ~/ shorthand. That’s why you need the full path like //Users/endemann/ rather than ~/.ssh/.
Why not just rely on the approval prompt? Deny rules take precedence over allow rules — they still apply even if you accidentally click “allow” or “always allow” on a prompt. They also help against prompt injection attacks where malicious content in a file tricks Claude into running something harmful.
But treat permissions as an extra layer, not a guarantee. The permission system can be finicky in practice: rule syntax is easy to get subtly wrong, Read deny rules apply only on a “best-effort” basis to built-in tools like Grep and Glob, and an allowed Bash command (like cat .env) can still read a file that a Read deny rule covers — which is why you should deny both Read and the relevant Bash commands together. Beyond these documented gaps, users report that agents don’t follow permission settings 100% of the time. See this security deep-dive for details.
The practical conclusion: if you’re giving an agent terminal access, don’t let permission settings be the only thing protecting a real secret. Anything genuinely sensitive — passwords, API keys, tokens — should not sit in plaintext in local storage at all. The next section shows how.
Keep secrets out of .env files — inject them at runtime with 1Password
.env files
If an agent has terminal access, assume anything in plaintext on your disk can eventually be read. Deny rules (above) should stop Claude Code from reading .env, but as noted, enforcement isn’t perfect — and deny rules don’t help at all if you accidentally git add . and commit the file, paste it into a chat, or share your screen. The only secret an agent can’t leak is one that never touches the disk: keep real values in 1Password and inject them at runtime with op run (terminal workflows) or the 1Password SDKs (long-running apps).
The safer pattern is to not have plaintext secrets on disk in the first place. Store API keys (Anthropic, OpenAI, HuggingFace, database passwords, etc.) in 1Password and have them injected into the process environment only at the moment a command runs.
Enrolled students, student employees, and paid faculty/staff are eligible for a UW-Madison University 1Password account at no cost. Anyone with a @wisc.edu address (including retirees and emeritus) can get a free Families account.
- UW-Madison 1Password service page — overview and links
- Eligibility — who can get which plan
- Request activation — go to profile.wisc.edu/doit-services, click Request Activation, then accept the invite from
accounts@1password.comand sign in with your NetID at uw-madison.1password.com - Getting started with 1Password at UW
UW Health note: do not store UW Health or Meriter credentials in 1Password.
How it works
Instead of plaintext like OPENAI_API_KEY=sk-... in .env, you store a secret reference that points to your vault:
OPENAI_API_KEY=op://Private/OpenAI/api-key
ANTHROPIC_API_KEY=op://Private/Anthropic/credential
Then you launch your command through op run, which resolves the references and exposes the real values only inside the child process’s environment — nothing is ever written to disk:
op run --env-file=.env -- python train.py
op run --env-file=.env -- node index.js
op run --env-file=.env -- claude     # Claude Code sees the keys; the disk does not
The reference syntax is op://<vault>/<item>/[section/]<field> — see the official reference. The easiest way to get one: right-click a field in the 1Password desktop app and choose Copy Secret Reference.
op run actually works (step by step)
This trips a lot of people up the first time, so it’s worth being explicit:
- The
.envfile exists on disk, but it only containsop://...references — no real secret values. This file is safe to commit. - You run
op run --env-file=.env -- python train.py.op runparses.env, sees the references, and fetches the real values from your 1Password vault into memory. op runspawnspython train.pyas a child process withOPENAI_API_KEY=sk-...real-value...set in that process’s environment only.- Your Python script reads
os.environ["OPENAI_API_KEY"]and gets the real key — no code changes needed. - When the Python process exits, those env vars disappear. Nothing was ever written to
.env, no temp files, no shell history.
So the real secret only ever lives in the child process’s memory. The .env on disk only ever holds the pointer. op run does not rewrite .env — there’s no “fill in the values at runtime” step that touches the file.
There is a separate command, op inject, that does write resolved values to a file — useful for tools that can’t be wrapped in op run (e.g., a daemon’s config file). But that output lands on disk, so you gitignore it and delete it afterward. Default to op run unless you have a specific reason to materialize the file.
op run vs. the 1Password SDKs — which one do I use?
You have two ways to pull secrets from 1Password. They aren’t competing; they fit different shapes of project.
op run — wraps a command at the shell level. Your code is unchanged — it reads os.environ["OPENAI_API_KEY"] like always.
op run --env-file=.env -- python train.py
op run --env-file=.env -- claude
Use it for: CLI scripts, training jobs, dev tooling, Makefile targets, Claude Code itself — anything you launch from a terminal. This is the default; start here.
The 1Password SDK — embed the fetch inside your app code. Your app imports the Python / Node / Go / .NET SDK and calls resolve() at startup:
from onepassword import Client
client = await Client.authenticate(auth=os.environ["OP_SERVICE_ACCOUNT_TOKEN"], ...)
GEMINI_API_KEY = await client.secrets.resolve("op://Research/Gemini/api-key")
Use it for: long-running web apps (Flask, FastAPI, Express), Kubernetes pods, daemons — anything where wrapping the entrypoint with op run is awkward, or where you want to re-fetch / rotate secrets without restarting the process.
The SDKs also pair with 1Password Environments — a per-app bucket of secrets, separate from your Private vault — which is the recommended home for production app secrets. See “Replace .env with 1Password SDKs” for a walkthrough.
Set it up
Step 1 — Install the 1Password CLI (official install docs):
brew install 1password-cli
op --version
winget install 1Password.CLI
op --versionFollow the apt/dnf instructions on the official install page. Homebrew on Linux also works.
Step 2 — Enable desktop app integration. Open the 1Password 8 desktop app → Settings → Developer → enable “Integrate with 1Password CLI”. Now op authenticates via Touch ID / Windows Hello / system biometrics instead of long-lived session tokens. See the app integration docs and biometric unlock docs.
Step 3 — Store your API keys in 1Password. Create a new item (type: API Credential or Password) in your UW-Madison vault for each key you use (Anthropic, OpenAI, HuggingFace, etc.).
Step 4 — Replace your .env with references. The new file contains only op://... references — no plaintext secrets — and is safe to commit to the repo so the rest of your team knows which variables to set:
# .env — safe to commit; values resolved at runtime by `op run`
OPENAI_API_KEY=op://Private/OpenAI/api-key
ANTHROPIC_API_KEY=op://Private/Anthropic/credential
HF_TOKEN=op://Private/HuggingFace/token
Step 5 — Run commands through op run. Your script reads os.environ["OPENAI_API_KEY"] (Python) or process.env.OPENAI_API_KEY (Node) exactly as before — op run populates them transparently.
Authentication and session lifetime
How op authenticates depends on whether a human is at the keyboard.
Interactive (your laptop, with desktop app integration): The 1Password desktop app must be unlocked. Day-to-day this is barely noticeable — unlocking is a Touch ID / Windows Hello tap, and op run triggers an unlock prompt if the app is locked. Two timers to know:
- Desktop-authenticated CLI/SDK sessions expire after 10 minutes of inactivity, or whenever 1Password locks (1Password announcement, Feb 2026). After that, your next
op runre-prompts for biometrics. The short window is deliberate — it limits exposure if you walk away from an unlocked machine. - The desktop app’s own auto-lock is separately configurable in Settings → Security.
- If you
op signinwithout desktop integration, session tokens default to 30 minutes of inactivity. See Sign in and out.
Unattended (servers, CI runners, cron, scheduled jobs): Use a service account — a non-human identity scoped to specific vaults. You create the account in the 1Password admin console, get a token like ops_eyJhbG..., and export it as OP_SERVICE_ACCOUNT_TOKEN. Both op run and the SDKs work non-interactively from that point on:
export OP_SERVICE_ACCOUNT_TOKEN="ops_..."
op run --env-file=.env -- python app.pyexport command — it briefly puts the token in the open
The moment you paste the token into an export command, it exists in your clipboard, your terminal scrollback, and (depending on your shell) your shell history. Handle it deliberately:
- Never run the
exportin a terminal where a coding agent is active or might be launched. An agent with terminal access can read the environment it inherits (env,printenv) and may see your scrollback or history — pasting the token there hands it over. Do the export in a fresh terminal session used only for this, then close it. - Keep it out of shell history. In bash/zsh, a leading space usually skips history (
HISTCONTROL=ignorespace/ zsh’sHIST_IGNORE_SPACE), or unset/re-check withhistory | tailafterward. Better: on a real server, skip the interactiveexportentirely and load the token from your platform’s secret mechanism (CI secret store, systemdEnvironmentFile, hosting platform secret UI). - Clear your clipboard when you’re done — clipboard managers keep history, and anything running on your machine can read the clipboard. Copy something harmless over it, or use your clipboard manager’s clear/exclude feature. (The 1Password app can auto-clear copied values after a timeout: Settings → Security → Clear clipboard contents.)
Service-account tokens don’t expire on their own — they’re valid until you rotate or revoke them. Treat the token like any other production credential: don’t commit it, and load it through whatever mechanism your platform already uses for sensitive env vars (CI secret stores, your hosting platform’s secret UI, systemd EnvironmentFile, etc.). See the CI/CD integrations docs for GitHub Actions, GitLab, Kubernetes, and other recipes.
Fair question. The honest answer depends on where you’re running.
On your laptop: there is no long-lived token on disk. You authenticate to 1Password with three things: a master password (in your head), a Secret Key (random, can be kept offline), and device biometrics (Touch ID / Windows Hello, which live in the OS secure enclave — not a file). The unlocked session sits in the desktop app’s memory and expires on lock. None of these are a file an attacker can cat off your disk. That’s a real improvement over a plaintext .env sitting at ~/projects/myapp/.env.
On a server: yes, there’s a service-account token on disk somewhere — but it’s a meaningful reduction. You’ve gone from N API keys spread across every .env file on every server to one narrowly-scoped bootstrap credential. That one token can be (a) scoped read-only to a single vault, so the blast radius is bounded if it’s grabbed, (b) rotated and revoked centrally in the 1Password admin console instead of SSH-ing into every server, and (c) audited — 1Password logs which service account read which secret when, which raw .env files don’t. And the actual app secrets (Gemini, DB, etc.) still never touch disk — only the bootstrap token does.
So: laptop case is a clean win. Server case is “one narrowly-scoped, rotatable, audited token instead of many sprawling plaintext credentials.” Not zero risk, but defense in depth — not security theater.
.gitignore
Even though the op://-style .env is safe to commit, gitignore any resolved output from op inject (a sibling command that writes the resolved file to disk for tools that can’t be wrapped in op run):
# Resolved secret files — never commit
.env.local
.env.resolved
*.resolved.env
If you prefer the older convention of keeping .env itself gitignored, commit .env.template (with op:// references) instead and have teammates cp .env.template .env on first checkout.
Common pitfalls
- Shell expansion happens before
op runinjects.op run -- echo $OPENAI_API_KEYexpands$OPENAI_API_KEYin your parent shell (where it’s empty) before the child runs. Use single quotes and a subshell:op run -- bash -c 'echo $OPENAI_API_KEY'— though, ideally, never echo a secret at all. - Don’t
exportsecrets in your shell profile. Addingexport OPENAI_API_KEY=...to~/.zshrcputs the plaintext back on disk and defeats the point. Always launch the consuming process underop run. - Watch which vault you’re signed into. If you have both a UW-Madison University account and a personal account,
op://Private/...resolves against whichever account is active. Useop signinto switch, or qualify references with the account shorthand. - Shell history. Once a secret is in the child process’s environment, anything that prints it (e.g.,
env,printenv, an accidentalecho) may end up in~/.bash_historyor~/.zsh_history. Treat env-var secrets as memory-only.
Even with 1Password, keep your .env deny rules in place — there will be projects (legacy code, third-party tools) where a real .env still lands on disk temporarily, and you want Claude blocked from reading it if so. Defense in depth: deny rules block (most) reads of any secrets file that does exist; 1Password ensures most of them never exist in the first place.
Add allow rules to reduce prompt fatigue
These also go in ~/.claude/settings.json, inside the same permissions block as your deny rules. By default, Claude Code asks “Do you want to proceed?” before every file write, shell command, and git operation. This gets old fast — in a typical session you might approve the same git add, git commit, and git push sequence a dozen times. You can add allow rules so Claude runs trusted commands without asking:
Minimal — just stop the git and test prompts:
{
  "permissions": {
    "allow": [
      "Bash(git add *)",
      "Bash(git commit *)",
      "Bash(git push *)",
      "Bash(git checkout *)",
      "Bash(git log *)",
      "Bash(git diff *)",
      "Bash(git status)",
      "Bash(git rm *)",
      "Bash(gh *)",
      "Bash(python *)",
      "Bash(pytest *)"
    ]
  }
}
More aggressive — also auto-approve file edits:
{
  "permissions": {
    "allow": [
      "Edit",
      "Write",
      "Bash(git *)",
      "Bash(gh *)",
      "Bash(python *)",
      "Bash(pytest *)",
      "Bash(npm *)",
      "Bash(pip *)"
    ]
  }
}acceptEdits mode or enable sandboxing
Instead of listing individual allow rules, you can:
- Switch to
acceptEditsmode (Shift+Tabinside a session) — auto-approves all file edits while still prompting for bash commands. - Enable sandboxing (see Section 8) — this is the best option. Sandboxing auto-approves bash commands that stay within your project directory at the OS level, while actually increasing security.
- Use the interactive prompt — when Claude asks “Do you want to proceed?”, select “Yes, and don’t ask again for [command pattern]” to build up your allow list organically during a session.
You don’t have to add any allow rules — the default “ask before doing” behavior is safe, especially when you’re starting out. But if you find yourself mindlessly hitting “Yes” on every prompt, that’s a sign you should either add allow rules or enable sandboxing.
Check your current permissions
Run /permissions inside a Claude Code session at any time to see what rules are active and which settings file they came from. This is especially helpful to verify your deny rules are loaded correctly.
Use project-level settings for shared repos
Claude Code reads two settings files, and merges them:
| File | Scope | What to put here |
|---|---|---|
~/.claude/settings.json |
User-level — applies to every project you open | Personal deny rules (SSH keys, cloud creds, .env), model choice, sandbox config |
<project-root>/.claude/settings.json |
Project-level — applies only when Claude Code is launched inside this repo | Repo-specific deny rules (e.g., don’t read secrets/), shared team guardrails |
How merging works: Claude Code combines both files. If either file denies something, it’s denied — project-level deny rules apply to everyone, even if their personal settings are more permissive. You don’t have to choose one or the other; most teams use both.
The project-level file lives inside your Git repo, so you can commit it and every collaborator automatically inherits the same rules:
{
  "permissions": {
    "deny": [
      "Read(./.env)",
      "Read(./secrets/**)",
      "Bash(curl:*)",
      "Bash(wget:*)"
    ]
  }
}Path syntax: Paths starting with // are absolute (used in user-level settings to protect home-directory files like ~/.ssh/). Paths starting with ./ are relative to the project root (used in project-level settings). Use ** to match recursively. See the permission rules reference for full pattern syntax.
Interactive safeguards during a session
- Press
Escat any time to interrupt Claude Code mid-operation. - Press
Shift+Tabto cycle through permission modes during a session. - Use
/permissionsto view and manage active permissions. - Review every command before approving it — especially
rm,mv, file writes outside your project, and anything involvingsudo.
Permission mode cheat sheet
| Mode | What it does | When to use it |
|---|---|---|
| default | Asks before most operations | Day-to-day work (recommended) |
| acceptEdits | Auto-approves file edits, still asks for bash commands | Trusted refactoring tasks |
| plan | Read-only, no modifications allowed | Exploring a codebase, code review |
| dontAsk | Auto-denies anything not explicitly in allow list |
Strict automation |
| bypassPermissions | Skips ALL checks | Isolated containers only — never on your local machine |
8. Sandboxing (Strongly Recommended)
If you followed Section 5, sandboxing is already enabled in your settings.json. This section covers platform prerequisites, how to choose a sandbox mode, and what sandboxing actually does.
/sandbox (bubblewrap) won’t work out of the box inside a VS Code devcontainer — Docker’s default seccomp/AppArmor profile blocks the user namespaces it relies on. Treat the container itself as the isolation boundary instead. See the devcontainer vs. /sandbox callout in Section 2 for the full explanation.
Sandboxing is the strongest protection available against Claude modifying files outside your project. It uses OS-level enforcement (not just Claude’s own judgment) to restrict what bash commands can access — even if a prompt injection bypasses Claude’s decision-making.
What sandboxing does (official docs):
- Filesystem isolation: Write access is restricted to the current working directory and its subdirectories — Claude cannot modify, create, or delete files outside your project directory. This is enforced at the OS kernel level. However, Claude can still read files anywhere on the machine (unless blocked by deny rules), and anything it reads can be included in prompts sent to Anthropic’s servers. This is an important limitation — sandboxing alone is not sufficient to protect sensitive data that exists elsewhere on the same machine.
- Network isolation: Only approved domains can be accessed. New domain requests trigger a permission prompt. This prevents data exfiltration even if Claude is compromised.
Add these deny rules to your ~/.claude/settings.json to prevent Claude from reading files outside your project:
{
  "permissions": {
    "deny": [
      "Read(//**)",
      "Read(~/**)",
      "Bash(cat:*)"
    ]
  }
}Read(//**)— blocks the Read tool from accessing any file via an absolute path (files inside your project use relative paths and are unaffected)Read(~/**)— blocks reads via home directory pathsBash(cat:*)— blocks the most common Bash bypass for Read deny rules
Caveats: Read deny rules are best-effort for built-in tools like Grep and Glob. Other Bash commands beyond cat (e.g., head, tail, less) could also read files — add deny rules for those too if needed. For more granular deny rules targeting specific sensitive paths (SSH keys, cloud credentials, .env files), see Section 7.
Without sandboxing, these protections do not exist — Claude operates with your full user permissions, and can create/modify files in parent directories without any special prompt.
Anthropic reports that sandboxing reduces permission prompts by 84% while increasing security — you get fewer interruptions and better protection.
How to enable it:
Works out of the box using Apple’s Seatbelt framework. Inside a Claude Code session, run:
/sandboxChoose “Auto-allow mode” (recommended) — sandboxed commands run automatically without permission prompts, while anything that would exceed the sandbox boundaries falls back to the normal approval flow.
WSL2 uses bubblewrap for sandbox isolation — the same mechanism used on native Linux. WSL1 is not supported because bubblewrap requires kernel features only available in WSL2.
Step 1 — Confirm you’re on WSL2:
Open a Windows PowerShell window (not your WSL terminal) and run:
wsl -l -vYou should see VERSION 2 next to your distribution. If you’re on WSL1, upgrade to WSL2 first. Once confirmed, open your WSL2 terminal — all remaining steps run inside WSL.
Step 2 — Install Claude Code inside WSL2:
WSL2 is a separate Linux environment — your Windows PowerShell installation of Claude Code doesn’t carry over. Inside your WSL2 terminal, install it with npm:
npm install -g @anthropic-ai/claude-codeYou’ll also need to reconfigure your cloud CLI credentials inside WSL2, since it has its own filesystem and config:
gcloud auth login
gcloud auth application-default login
gcloud config set project YOUR_PROJECT_ID
aws configure
# Enter your Access Key ID, Secret Access Key, and default region when promptedVerify both are working:
claude --versionStep 3 — Copy your settings into WSL2:
WSL2 has its own home directory (/home/<you>/), completely separate from Windows (C:\Users\<you>\). Claude Code won’t see your Windows settings.json — you need a copy inside WSL2:
# Create the config directory if it doesn't exist
mkdir -p ~/.claude

# Copy your Windows settings into WSL2
cp /mnt/c/Users/$(cmd.exe /C "echo %USERNAME%" 2>/dev/null | tr -d '\r')/.claude/settings.json ~/.claude/settings.json
Or if you prefer, create ~/.claude/settings.json manually with the same content you used in Section 5 (use nano ~/.claude/settings.json).
Verify the settings look correct:
cat ~/.claude/settings.jsonStep 4 — Install sandbox dependencies:
# Ubuntu/Debian (most common WSL distro)
sudo apt-get update && sudo apt-get install bubblewrap socat

# Fedora
sudo dnf install bubblewrap socat
Step 5 — Launch Claude Code and enable sandboxing:
cd ~/projects/my-project   # navigate to your project first
claude                      # launch Claude Code
Then inside the Claude Code session, run:
/sandboxChoose “Auto-allow mode” — sandboxed commands run automatically, while anything outside sandbox boundaries falls back to the normal approval flow.
Step 6 — Verify it’s working:
After enabling, Claude’s bash commands should run without permission prompts as long as they stay within your project directory. If a command needs to write outside the project or access a new network domain, you’ll still get a prompt.
If you need tools like npm, pip, or kubectl to write outside your project directory (e.g., to ~/.npm or ~/.kube), grant specific write access in your settings.json:
{
  "sandbox": {
    "enabled": true,
    "filesystem": {
      "allowWrite": ["~/.npm", "~/.kube", "//tmp"]
    }
  }
}
Path prefixes: // = absolute path, ~/ = home directory, / = relative to settings file. See the official sandboxing docs for full path syntax.
Sandboxing is not yet supported on native Windows. Use deny rules and allow rules as your primary protection. If you need stronger isolation, consider running Claude Code from WSL2 instead.
Sandbox modes explained:
| Mode | Behavior | Best for |
|---|---|---|
| Auto-allow | Sandboxed commands run without prompts. Commands that exceed sandbox boundaries fall back to normal approval flow. | Day-to-day work — fewer interruptions, same security |
| Regular permissions | All commands go through standard approval, even when sandboxed. | When you want to review every command regardless |
In both modes, the OS-level filesystem and network restrictions are identical. The only difference is whether sandboxed commands are auto-approved.
Sandboxing applies only to Bash commands and their child processes. The built-in Read/Edit tools are governed by permission rules. Use both together for the strongest security posture — this is what Anthropic calls “defense in depth”.
Some tools are incompatible with sandboxing (e.g., docker, watchman). If a tool fails inside the sandbox, you can exclude it with "excludedCommands" in your sandbox settings so it runs outside the sandbox with normal permission prompts instead.
Further reading on permissions & security
- Official permissions docs — full reference for rule syntax, tool names, managed policies
- Official sandboxing docs — setup, configuration, and security model for OS-level isolation
- Anthropic engineering blog on sandboxing — explains the design rationale and how filesystem + network isolation work together
- Security deep-dive by Pete Freitag — independent analysis of how permissions actually work under the hood, including gotchas and bypasses
- Permission modes guide — when to use each mode, with workflow examples
9. Billing, Cost Management & Avoiding Runaway Costs
Official cost management docs: code.claude.com/docs/en/costs
Every token you send and receive is billed to your cloud project. Unlike a Claude Pro/Max subscription with fixed monthly pricing, there is no spending cap unless you set one up yourself. You can rack up significant charges quickly if you’re not careful.
Typical costs to expect
According to Anthropic’s own documentation, the average Claude Code session costs about $6 per developer per day, with 90% of users staying under $12/day. However, this is an average — complex tasks, long sessions, or agentic loops can blow past this easily. Monthly costs with Sonnet typically run $100–$200/developer, but there’s large variance.
Use the /cost command inside Claude Code at any time to see your current session’s token usage and estimated cost:
/costUnderstand what drives costs
Token costs scale with context size — the more context Claude processes, the more you pay. Key cost drivers:
- Long conversations: Claude re-processes the entire conversation history with each message. A session that’s been going for hours costs more per-message than a fresh one.
- Large codebases: If Claude reads many files to understand your project, that’s all input tokens.
- Extended thinking: Enabled by default with a budget of ~32K tokens. Thinking tokens are billed as output tokens (the expensive kind). For simple tasks, this is overkill.
- Agentic loops (see below): The single biggest risk for runaway costs.
Agentic loops — the #1 cost risk
An agentic loop happens when Claude gets stuck in a cycle — repeatedly reading the same files, running the same commands, or auto-compacting and re-expanding its context. This can burn through tokens at an alarming rate.
Real-world examples from the community:
- One user reported a bug where an auto-compacting loop consumed 108 million tokens in a single day ($64–$78), compared to their normal 12–68M tokens/day.
- Runaway spikes of $235+ over a 4-day period were documented from that same loop bug.
- Version updates have occasionally caused 4x faster token consumption on the same tasks.
How to protect yourself:
- Watch for signs: If Claude seems to be reading the same files over and over, or your
/costjumps unusually fast, pressEscimmediately to interrupt. - Use
/compactto compress long conversations before they bloat. - Use
/clearwhen switching to unrelated tasks — don’t let stale context accumulate. - Be specific in prompts. Vague requests like “improve this codebase” trigger broad scanning. “Add input validation to the login function in
auth.ts” is much cheaper. - Use plan mode (Shift+Tab) before expensive operations. Claude outlines its approach for your approval before writing code, preventing costly rework.
- Start with Sonnet, not Opus. Only escalate to Opus for genuinely complex reasoning tasks. Opus costs significantly more per token.
Set up budget alerts (do this NOW)
Budget alerts won’t automatically stop spending, but they’ll email you when you’re approaching a threshold. Set this up before your first Claude Code session.
GCP budget alerts: cloud.google.com/billing/docs/how-to/budgets
- Go to Billing → Budgets & Alerts in the GCP Console.
- Click Create Budget.
- Scope it to your project (e.g.,
doit-gcp-PROJECT-ID). - Set a monthly budget amount you’re comfortable with (e.g., $50, $100, $200).
- Set alert thresholds at 50%, 80%, and 100% of your budget.
- Add your email as a notification recipient.
Budget alerts are notifications only — they do NOT automatically stop your services or disable billing. If you hit 100% of your budget at 2 AM, charges will continue until you manually intervene. Check your billing console daily.
Set quota limits as a hard ceiling:
Unlike budget alerts, quotas can actually stop usage. Go to Quotas & System Limits and set reasonable TPM (tokens per minute) quotas for the Claude models you’re using. If you hit your quota, Claude Code will get 429 errors instead of running up your bill.
AWS Budgets docs: docs.aws.amazon.com/cost-management/latest/userguide/budgets-managing-costs.html
- Go to AWS Budgets in the AWS Console.
- Click Create budget.
- Choose Cost budget and set a monthly amount (e.g., $50, $100, $200).
- Add alert thresholds at 50%, 80%, and 100% of your budget.
- Add your email as a notification recipient.
Like GCP, AWS budget alerts are notifications only by default — they do NOT automatically stop your services. However, AWS does support budget actions that can automatically restrict IAM permissions when a threshold is hit. Consider setting up an action to revoke bedrock:InvokeModel at 100% of budget as a hard stop.
Bedrock quotas:
Bedrock enforces per-model quotas on RPM (requests per minute) and TPM (tokens per minute). Default quotas are relatively low (e.g., 25 RPM for Opus). View and request increases at Service Quotas → Amazon Bedrock in the AWS Console.
Check your billing console daily
Make it a habit to check your cloud billing daily while actively using Claude Code. Look for:
- Unexpected spikes in AI/ML charges
- Daily costs that exceed your expectations
- Any charges from services you didn’t intentionally use
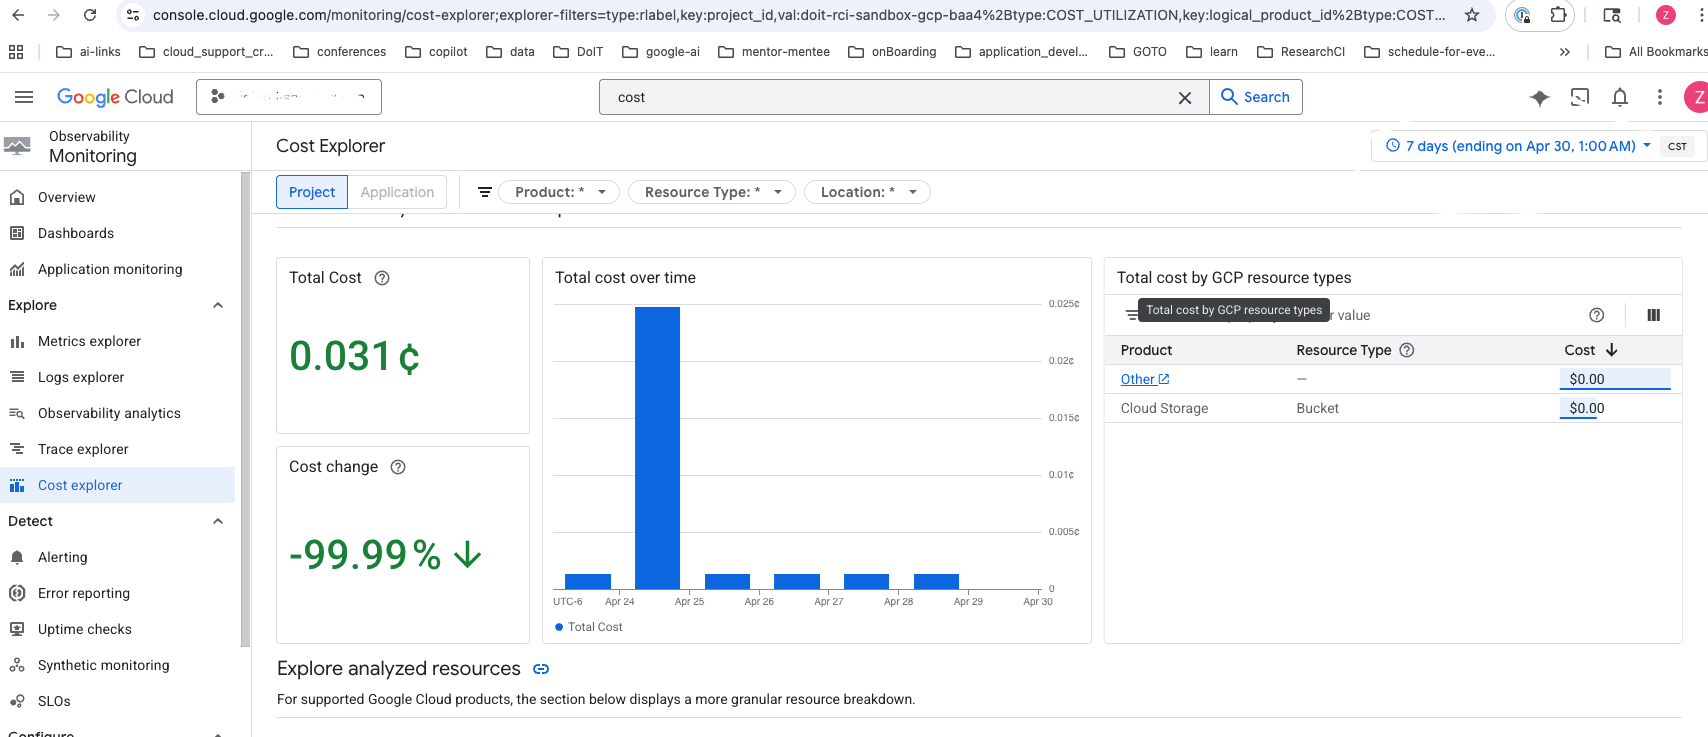
Go to Billing → Reports in the GCP Console. Filter by your project and look at costs for the aiplatform.googleapis.com service, which includes Claude models. You can also break down costs by SKU to see specific model usage.
Go to Cost Explorer in the AWS Console. Filter by service (Amazon Bedrock) and look at your daily costs. You can also break down costs by usage type to see specific model usage.
Cost-saving tips
| Strategy | Savings |
|---|---|
| Use Sonnet instead of Opus for routine tasks | Significantly lower per-token cost |
Run /clear between unrelated tasks |
Avoids paying to re-process old context |
Run /compact during long sessions |
Compresses context, reduces per-message cost |
Lower extended thinking budget (MAX_THINKING_TOKENS=8000) |
Reduces output token costs on simple tasks |
Keep your CLAUDE.md files lean (<200 lines recommended) |
Less context loaded on every message — see below |
| Use plan mode before big refactors | Catches wrong approaches before expensive execution |
| Disable non-essential model calls | DISABLE_NON_ESSENTIAL_MODEL_CALLS=1 in env |
Pricing reference
For the latest Claude model pricing, see:
- Anthropic Pricing — base token rates by model, including cache and batch discounts
- Claude Code Cost Management — Anthropic’s official guide to tracking and reducing Claude Code costs
- Vertex AI Generative AI Pricing — Google’s per-token rates (regional endpoints carry a 10% premium over global)
- Amazon Bedrock Pricing — AWS per-token rates for Claude models
On Vertex AI, the token usage shown on the GCP Quotas page may be inaccurate for Claude models due to estimation and refund logic. For accurate billing, check the GCP Billing Reports page or use /cost inside Claude Code.
10. Data Usage & Privacy
Official data usage docs: code.claude.com/docs/en/data-usage
Training policy
Whether your code is used for model training depends on your account type:
| Account type | Used for training? |
|---|---|
| API, Vertex AI, Bedrock, Foundry (commercial) | No — Anthropic does not train on your prompts or outputs unless you explicitly opt in (e.g., the Development Partner Program) |
| Team & Enterprise (commercial) | No — same commercial terms |
| Free, Pro, Max (consumer) | Opt-in — you choose whether to allow training at claude.ai/settings/data-privacy-controls |
If you’re accessing Claude Code through a UW-Madison cloud account (Vertex AI or Bedrock), your usage falls under Anthropic’s commercial terms — your code is not used for training. However, note that UW-Madison does not yet have a direct data-use agreement with Anthropic. The no-training guarantee comes from Anthropic’s standard commercial terms, not from a UW-negotiated agreement. This distinction matters for restricted or regulated data — see the data sensitivity warning at the top of this guide.
Important nuances for consumer plans (Free/Pro/Max):
- Safety exception: Even with training disabled, conversations flagged for safety review may be used to improve Anthropic’s safety systems (e.g., training safeguard models).
- What’s included: The entire conversation — prompts, outputs, custom styles, and conversation preferences.
- What’s excluded: Raw content from connectors (Google Drive, MCP servers) is not included, unless you directly copy that content into your conversation.
- Feedback (thumbs up/down): Submitting feedback stores the full related conversation for up to 5 years (de-linked from your user ID). This data may be used for training regardless of your training setting.
Data retention
| Account type | Retention period |
|---|---|
| API / Vertex AI / Bedrock / Team / Enterprise | 30 days (default) |
| Enterprise with Zero Data Retention (ZDR) | 0 days (must be enabled per organization) |
| Consumer — training allowed | 5 years |
| Consumer — training not allowed | 30 days |
Claude Code also caches sessions locally on your machine for up to 30 days to enable session resumption (configurable).
Telemetry and error reporting
Claude Code sends operational metrics and error reports by default when using the direct Claude API:
| Service | What it sends | Opt-out |
|---|---|---|
| Statsig (metrics) | Latency, reliability, usage patterns — no code or file paths | DISABLE_TELEMETRY=1 |
| Sentry (errors) | Error logs — no code or file paths | DISABLE_ERROR_REPORTING=1 |
/bug command |
Full conversation history including code (only when you run /bug) |
DISABLE_BUG_COMMAND=1 |
| Session quality surveys | Numeric rating only (1/2/3/dismiss) — no conversation data | CLAUDE_CODE_DISABLE_FEEDBACK_SURVEY=1 |
Using Vertex AI, Bedrock, or Foundry? All non-essential traffic (telemetry, error reporting, /bug, surveys) is disabled by default for third-party providers. You don’t need to set any environment variables.
To disable everything at once regardless of provider, set CLAUDE_CODE_DISABLE_NONESSENTIAL_TRAFFIC=1. Environment variables can be set in your settings.json.
11. Troubleshooting
“model not found” (404):
The model may not be available on the global endpoint. Try changing your region:
"CLOUD_ML_REGION": "us-east5"Or add a model-specific override (see Section 5).
429 “Resource Exhausted”:
You need a quota increase. Go to Cloud Console → Quotas, filter by the Claude model, and request an increase.
Permission denied / IAM errors:
Ask your UW-Madison GCP admin to ensure you have the roles/aiplatform.user role on the project.
gcloud command not found:
Make sure the Google Cloud SDK is installed and restart PowerShell.
If you installed via Homebrew, run source "$(brew --prefix)/share/google-cloud-sdk/path.zsh.inc" or restart your terminal. If you used the curl installer, make sure you ran source ~/.zshrc after install.
Authentication expired:
Re-run (both platforms):
gcloud auth application-default loginAccessDeniedException:
Your IAM user/role doesn’t have the required Bedrock permissions. Ensure your policy includes bedrock:InvokeModel and bedrock:InvokeModelWithResponseStream. See Section 4 for the full policy.
ValidationException: Model not found:
Check that: (1) you’ve enabled model access for the specific Claude model in the Bedrock console, (2) your AWS_REGION is set to a region where the model is available, and (3) your model ID is correct. Try us-east-1 if unsure.
ResourceNotFoundException:
You haven’t completed model access approval. Go to the Bedrock Model catalog and request access.
429 “ThrottlingException”:
You’ve hit your Bedrock quota. Request an increase at Service Quotas → Amazon Bedrock. Default quotas are low (e.g., 25 RPM for Opus).
aws command not found:
Make sure the AWS CLI is installed and restart PowerShell.
If you installed via Homebrew, restart your terminal. If you used the pkg installer, ensure /usr/local/bin is in your $PATH.
Credentials expired (SSO):
Re-run:
aws sso login --profile your-profile-nameClaude Code supports automatic credential refresh for AWS SSO. Configure awsAuthRefresh in your settings so Claude Code automatically re-authenticates when credentials expire mid-session, instead of failing with auth errors.
Common issues (both providers)
claude command not found:
Ensure C:\Users\<you>\.local\bin is in your user PATH (see Section 2). Restart PowerShell after editing PATH.
Ensure ~/.claude/bin or ~/.local/bin is in your $PATH. Restart your terminal or run source ~/.zshrc.
Run diagnostics:
claude doctorThis checks your installation, authentication, and configuration for common issues.
12. Quick Reference
# Install Claude Code
irm https://claude.ai/install.ps1 | iex

# Install gcloud (if needed)
# Download from https://cloud.google.com/sdk/docs/install

# Authenticate with GCP
gcloud auth login
gcloud auth application-default login

# Launch Claude Code
cd C:\your\project
claude
# Install Claude Code
curl -fsSL https://claude.ai/install.sh | bash
# or: brew install --cask claude-code
# Install gcloud (if needed)
brew install --cask google-cloud-sdk
# or: curl https://sdk.cloud.google.com | bash
# Authenticate with GCP
gcloud auth login
gcloud auth application-default login
# Launch Claude Code
cd ~/your/project
claude# Install Claude Code
irm https://claude.ai/install.ps1 | iex
# Install AWS CLI (if needed)
# Download from https://docs.aws.amazon.com/cli/latest/userguide/getting-started-install.html
# Authenticate with AWS
aws sso login --profile your-profile
# or: aws configure
# Launch Claude Code
cd C:\your\project
claude# Install Claude Code
curl -fsSL https://claude.ai/install.sh | bash
# or: brew install --cask claude-code
# Install AWS CLI (if needed)
brew install awscli
# Authenticate with AWS
aws sso login --profile your-profile
# or: aws configure
# Launch Claude Code
cd ~/your/project
claudeIn-session commands (all providers)
/status        # Confirm your cloud provider is active
/cost          # Check current session token usage and cost
/compact       # Compress conversation context to save tokens
/clear         # Wipe context when switching tasks
/permissions   # View and manage active permission rules
/sandbox       # Check or enable OS-level sandboxing
Esc            # Interrupt Claude mid-operation
Shift+Tab      # Cycle through permission modes
13. Next Steps — Your First Session
You’re set up. Here’s what to do the first time you launch Claude Code in a real project.
Set up your CLAUDE.md
CLAUDE.md is a markdown file in your project root that gives Claude persistent context — build commands, test commands, architectural conventions, anything Claude can’t infer from the code alone. It loads automatically at the start of every session.
Run /init inside Claude Code to generate a starter file, but treat the output as a draft, not a finished product. Manually curate it down to only what Claude actually needs. Research from ETH Zurich (Banerjee et al., 2025) found that LLM-generated context files can actually decrease agent performance compared to no context file at all — the auto-generated content adds noise that dilutes the instructions that matter.
CLAUDE.md
Anthropic’s own guidance is blunt: “For each line, ask: ‘Would removing this cause Claude to make mistakes?’ If not, cut it.” Claude Code triggers a performance warning when CLAUDE.md exceeds ~40,000 characters. Community consensus recommends under 200 lines. Key principles:
- Don’t send an LLM to do a linter’s job. Code style rules belong in your linter/formatter config, not in
CLAUDE.md. - Use skills for specialized knowledge. Skills load on demand — a
/deployskill only enters context when relevant, keepingCLAUDE.mdlean. - Use
.claude/rules/for scoped rules. Rules that only apply to certain file types (e.g.,.tsxconventions) can live in context-specific rule files instead of the globalCLAUDE.md. - Periodically prune. As your project evolves, remove instructions that Claude follows correctly without being told.
For more detail on CLAUDE.md authoring, prompt techniques, and workflow patterns, see our companion guide: Claude Code Best Practices.
Pick the right model for the task
Your settings.json sets a default model, but you can switch mid-session with /model. A general rule of thumb:
| Model | Best for | Cost |
|---|---|---|
| Sonnet | Day-to-day coding, refactoring, test writing, most tasks | Lowest |
| Opus | Complex multi-step reasoning, architecture decisions, subtle bugs | Highest |
| Haiku | Quick lookups, simple edits, boilerplate generation | Very low |
Start with Sonnet — it handles the vast majority of tasks well. Escalate to Opus only when you notice Sonnet struggling with complex reasoning. Use Haiku for high-volume, low-complexity work where cost matters.
Build good habits early
- Commit before you start. A clean Git state means you can always
git diffto see what Claude changed, orgit checkout .to revert. - Be specific. “Add input validation to the
login()function inauth.py” is cheaper and more reliable than “improve the auth module.” - Use
/compactand/clearto manage context. Long sessions get expensive and Claude’s attention degrades as context grows (Liu et al., 2024). - Press
Escthe moment something looks wrong. Don’t let an agentic loop run up your bill — see Section 9.