Notebooks as Controllers
Last updated on 2024-11-06 | Edit this page
Overview
Questions
- How do you set up and use SageMaker notebooks for machine learning tasks?
- How can you manage compute resources efficiently using SageMaker’s controller notebook approach?
Objectives
- Describe how to use SageMaker notebooks for ML workflows.
- Set up a Jupyter notebook instance as a controller to manage compute tasks.
- Use SageMaker SDK to launch training and tuning jobs on scalable instances.
Step 2: Running Python code with SageMaker notebooks
Amazon SageMaker provides a managed environment to simplify the process of building, training, and deploying machine learning models. By using SageMaker, you can focus on model development without needing to manually provision resources or set up environments. In this episode, we’ll guide you through setting up a SageMaker notebook instance—a Jupyter notebook hosted on AWS specifically for running SageMaker jobs. This setup allows you to efficiently manage and monitor machine learning workflows directly from a lightweight notebook controller. We’ll also cover loading data in preparation for model training and tuning in future episodes, using the Titanic dataset stored in S3.
Note for hackathon attendees: We’ll use SageMaker notebook instances (not the full SageMaker Studio environment) for simpler instance management and streamlined resource usage, ideal for collaborative projects or straightforward ML tasks.
Using the notebook as a controller
In this setup, the notebook instance functions as a
controller to manage more resource-intensive compute
tasks. By selecting a minimal instance (e.g., ml.t3.medium)
for the notebook, you can perform lightweight operations and leverage
the SageMaker Python SDK to launch more powerful,
scalable compute instances when needed for model training, batch
processing, or hyperparameter tuning. This approach minimizes costs by
keeping your controller instance lightweight while accessing the full
power of SageMaker for demanding tasks.
Summary of key steps
- Navigate to SageMaker in AWS.
- Create a Jupyter notebook instance as a controller.
- Set up the Python environment within the notebook.
- Load the Titanic dataset from S3.
- Use SageMaker SDK to launch training and tuning jobs on powerful instances (covered in next episodes).
- View and monitor training/tuning progress (covered in next episodes).
Detailed procedure
1. Navigate to SageMaker
- In the AWS Console, search for SageMaker.
- Protip: select the star icon to save SageMaker as a bookmark in your AWS toolbar
- Select SageMaker - Build, Train, and Deploy Models.
2. Create a new notebook instance
- In the SageMaker left-side menu, click on Notebooks, then click Create notebook instance.
-
Notebook name: Enter a name that reflects your
notebook’s primary user (your name), dataset (titanic), purpose
(train-tune), and models utilized (XGBoost-NN). Hackathon
attendees must use the following convention:
TeamName-YourName-Dataset-NotebookPurpose(s)-Model(s) (e.g.,
MyAwesomeTeam-ChrisEndemann-Titanic-Train-Tune-XGBoost-NN). -
Instance type: Start with a small instance type,
such as
ml.t3.medium. You can scale up later as needed for intensive tasks, which will be managed by launching separate training jobs from this notebook. For guidance on common instances for ML procedures, refer to this spreadsheet. - Platform identifier: You can leave this as the default.
-
Permissions and encryption:
-
IAM role: Choose an existing role or create a new
one. Hackathon attendees should select
‘ml-sagemaker-use’. The role should include the
AmazonSageMakerFullAccesspolicy to enable access to AWS services like S3. - Root access: Enable root access to notebook.
- Encryption key (optional): Specify a KMS key for encrypting data at rest if needed. Otherwise, leave it blank.
-
IAM role: Choose an existing role or create a new
one. Hackathon attendees should select
‘ml-sagemaker-use’. The role should include the
- Network (optional): Networking settings are optional. Configure them if you’re working within a specific VPC or need network customization.
- Git repositories configuration (optional): You don’t need to complete this configuration. Instead, we’ll run a clone command from our notebook later to get our repo setup. This approach is a common strategy (allowing some flexiblity in which repo you use for the notebook.
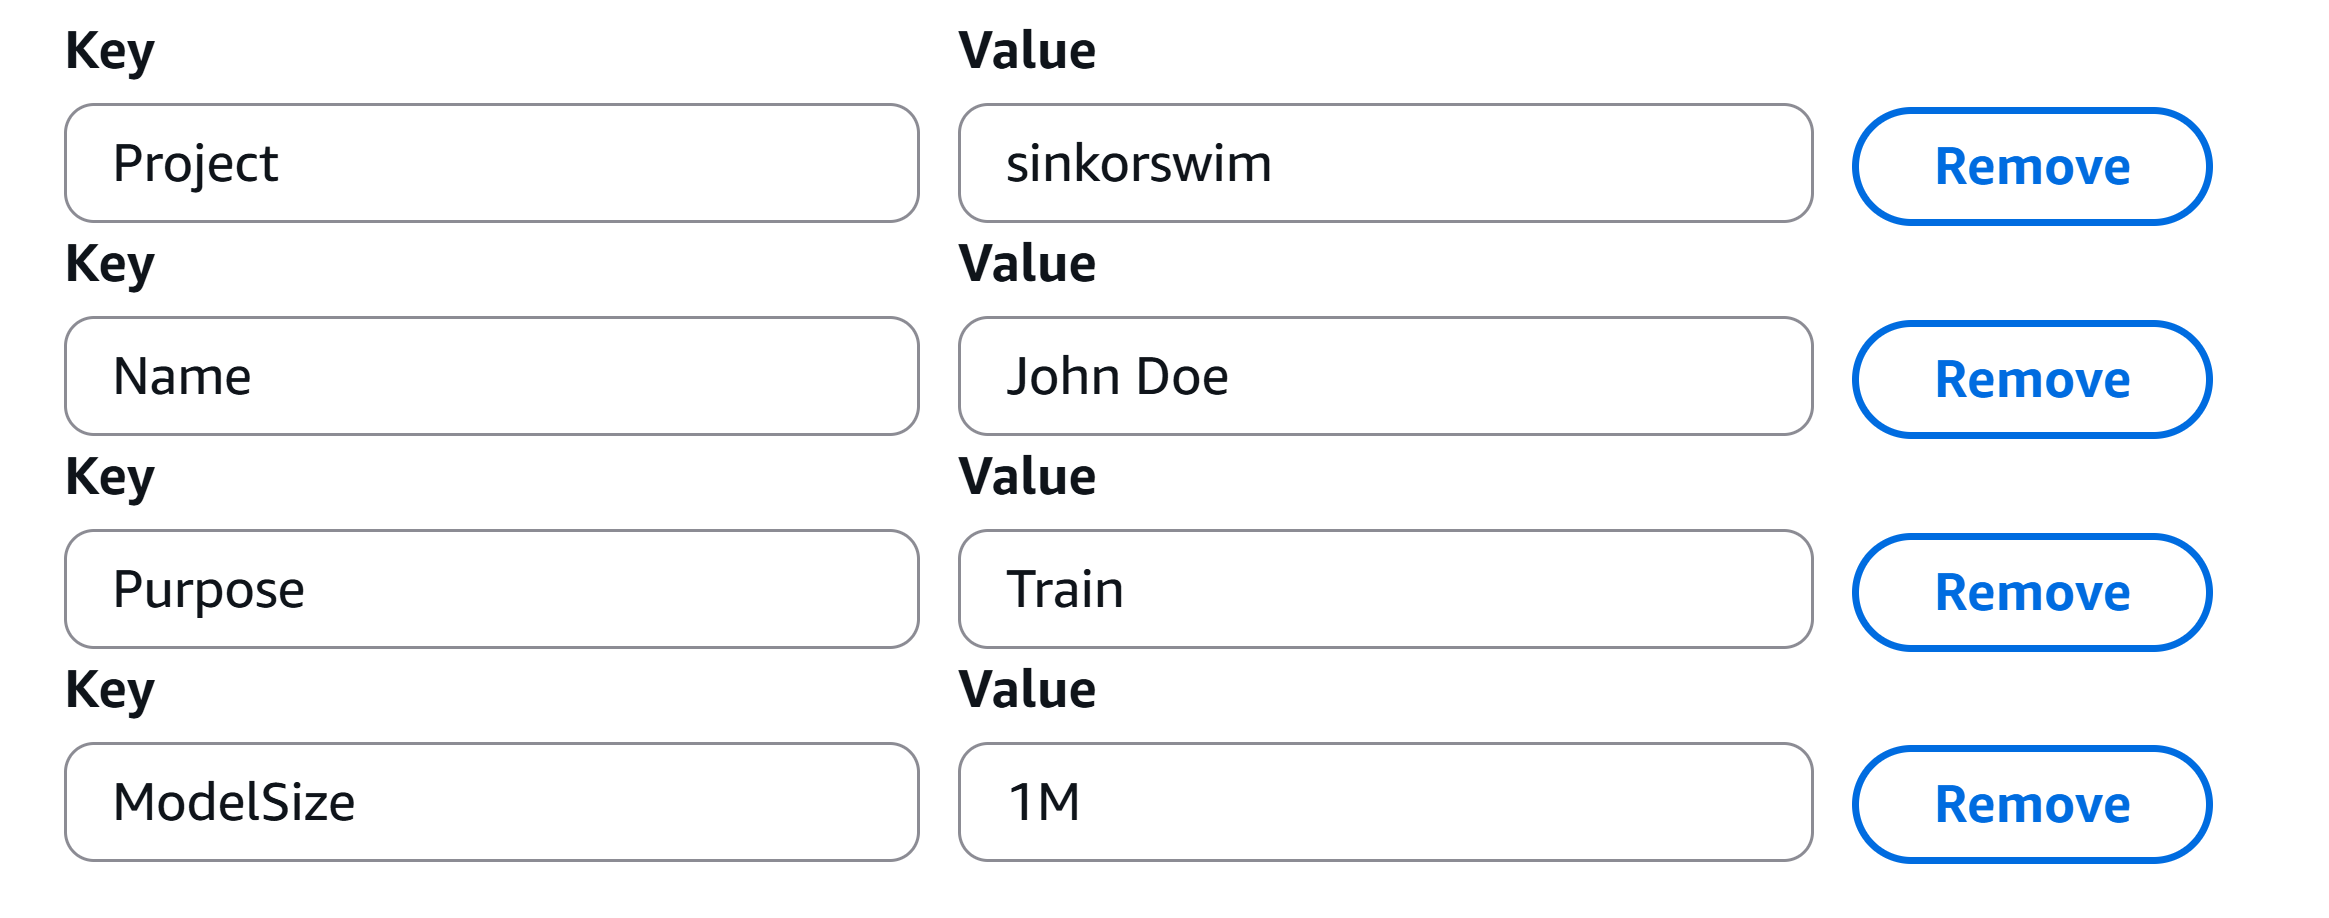
- Tags (required for hackathon attendees): Adding tags helps track and organize resources for billing and management. This is particularly useful when you need to break down expenses by project, task, or team. Please use the tags found in the below image to track your notebook’s resource usage.

- Click Create notebook instance. It may take a few minutes for the instance to start. Once its status is InService, you can open the notebook instance and start coding.
Managing training and tuning with the controller notebook
In the next couple expisodes, we’ll use the SageMaker Python SDK within the notebook to launch compute-heavy tasks on more powerful instances as needed. Examples of tasks to launch include:
-
Training a model: Use the SDK to submit a training
job, specifying a higher-powered instance (e.g.,
ml.p2.xlargeorml.m5.4xlarge) based on your model’s resource requirements. - Hyperparameter tuning: Configure and launch tuning jobs, allowing SageMaker to automatically manage multiple powerful instances for optimal tuning.
This setup allows you to control costs by keeping the notebook instance minimal and only incurring costs for larger instances when they are actively training or tuning models. Detailed guidance on training, tuning, and batch processing will follow in later episodes.
For more details, refer to the SageMaker Python SDK documentation for example code on launching and managing remote training jobs.
Key Points
- Use a minimal SageMaker notebook instance as a controller to manage larger, resource-intensive tasks.
- Launch training and tuning jobs on scalable instances using the SageMaker SDK.
- Tags can help track costs effectively, especially in multi-project or team settings.
- Use the SageMaker SDK documentation to explore additional options for managing compute resources in AWS.
